Create a basic HTML5 platformer with Crafty and Box2D – Part 3

Halt, brave adventurer!
This article requires some knowledge of JavaScript.
Documentation: JavaScript, Crafty, Box2DWeb (Basic Usage).
Github repo: Crafty Platformer Tutorial
Every game needs a hero.
A game wouldn’t be complete without a protagonist, right? So let us create one.
Though he’s not much of a hero, I’ll be using this Guinea pig.

And here’s an animated version. We won’t be using this gif though.

It will have to do for now. Feel free to create your own hero though. Just make sure you create a spritesheet of your hero.
The implementation.
The sprite
Save your spritesheet (or use mine) to your web/images/ folder and give it an appropriate name.
First, we will have to define the sprite in the sprites.js file. Following the example, you should have something like this:
        images:{
            'ufo' : {
                 'file' : 'web/images/ufo.png',
                 'tile' : 211,
                 'tileh' : 117,
                 'elements': {
                     'ufo' : [0, 0]
                 }
            },
            'guinea' : {
                 'file' : 'web/images/guineapig.png',
                 'tile' : 80,
                 'tileh' : 56,
                 'elements': {
                     'guinea' : [0, 0]
                 }
            }
        }
NOTE: The “tile” property should be the width of a single frame of your animation. In my case it’s 80 pixels.
The entity
Now that Crafty knows which sprites to load, we can continue. Now we’ll create the entity.
Obviously we’re going to create it in the entities folder.
Create a new javascript file there. Mine’s called guineapig.js.
Let me first show you what’s in it. I’ll explain later.
GuineaPig = BaseEntity.extend({
    defaults: {
    },
    initialize: function(){
    	var model = this;
    	var entity = Crafty.e("2D, " + gameContainer.conf.get('renderType') + ", guinea, SpriteAnimation");

    	entity
            .attr({x: ((Crafty.viewport.width/2) - (entity.w/2)), y: 0, z: 300})
            .animate("walking", 0, 0, 2)
            .bind('EnterFrame', function(e){
              this.animate("walking", 20);
            })
            .setName('Guinea Pig');

            entity.origin(entity.w/2, entity.h/2);

    	model.set({'entity' : entity });
    }
});
So how does this all work?
First we need to extend the BaseEntity.
GuineaPig = BaseEntity.extend({ ... });
You will always have to do this when using Crafty’s Boilerplate. Don’t forget to name your entity as well. In my case GuineaPig.
Next up is the defaults. Here you can set properties of an entity. These will be Backbone properties from Backbone.js! Not Crafty properties.
defaults: { },
    initialize: function(){
    	...
    }
Everything in this function will be executed when the entity is first created. This will happen only once.
var model = this;
This is the variable that actually holds the Backbone object. You can use this variable to change the properties that you’ve defined in the defaults.
var entity = Crafty.e("2D, " + gameContainer.conf.get('renderType') + ", guinea, SpriteAnimation");
This is the actual entity itself. Note the “guinea” component, it has to be the same name as the sprite you defined in sprites.js.
Also the “SpriteAnimation” component is mandatory.
Next we set a few properties of our hero. I won’t go over all of them, just the special ones.
.animate("walking", 0, 0, 2)
With this one, we define the animation. Or in crafty terms: a “reel”.
The first parameter is the id of the reel.
The second one defines the x-value of the starting of the reel, unit is the width of our frame width. (It was 80 pixels, remember?)
The third parameter is the y-value. Unit is the height of our spritesheet.
And the fourth parameter is the end x position on the sprite map. In our case 2. (3 frames, but the index starts at 0 so it’s 2.)
Read more about it in their documentation: http://craftyjs.com/api/SpriteAnimation.html
            .bind('EnterFrame', function(e){
              this.animate("walking", 20);
            })
Now that we have defined the animation, we can use it. Just bind the animation to the EnterFrame event for now.
The first parameter is the reel id. As we have defined above.
The second parameter is actually the delay in-between frames. The unit is in milliseconds.
There, that’s it for our guinea pig. Now we just have to wrap it up.
Wrapping it up
Now that we have defined our hero, we still have to load it. This is done in our main scene.
        var elements = [
        "src/entities/ufo.js",
        "src/entities/guineapig.js",
        "src/interfaces/info.js"
	];
Simply adding our script will load it.
But that’s not enough. One more thing to do.
We still have to initialize it.
        //when everything is loaded, run the main scene
	require(elements, function() {
		//sc['ufo'] = new Ufo();
                sc['guineapig'] = new GuineaPig();
		infc['info'] = new Info();
	});
Easy, no? All we had to do was create a new instance of our hero.
I’ve also commented out the UFO object since we won’t be needing it. That means it won’t be initialized.
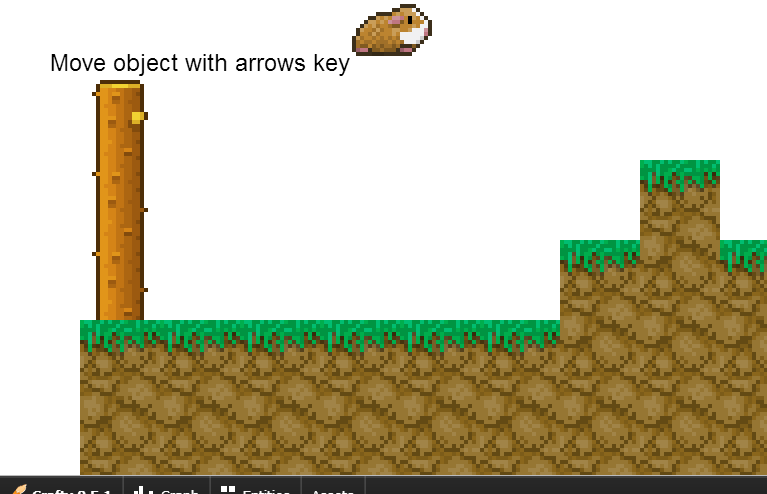
This should be the end result.
