Create a parallax scrolling effect using Flash Professional
Definition:
Parallax scrolling is a special scrolling technique in computer graphics, wherein background images move by the camera slower than foreground images, creating an illusion of depth in a 2D video game and adding to the immersion. – http://en.wikipedia.org/wiki/Parallax_scrolling
Intro
For my final Multimedia assignment I have to create a flash website and I wanted to add a certain special “touch” to it. Seeing as how parallax scrolling websites have become more and more popular, I thought I’d go ahead and try to create a parallax scrolling effect in Flash.
I’ve done some searching and I’ve found a few parallax scrolling libraries/frameworks for Flash, but most of them were coded for Actionscript 2.0 and others were not quite what I was looking for.
Then I remembered that Flash CS4 and newer versions support 3D positions and view on Movieclips. So I thought that could be used to create a parallax scrolling effect. And I did some testing and I created a simple prototype. And you know what? It actually worked!
So now that we know we can use 3D positions in flash to create a parallax scrolling effect, let’s try and do something with it.
Preview
Before we get started, I’m going to give a quick look at what we are going to create.
USAGE: Use the left and right arrow keys to move the parallax container.
Let’s get started
Requirements
- Flash Professional CS4 or higher
NOTE: You DO need some knowledge of Actionscript if you really want to do cool stuff with parallax scrolling.
Creating the effect
Anyway, on to the more interesting thing; the designing and creating of the effect.
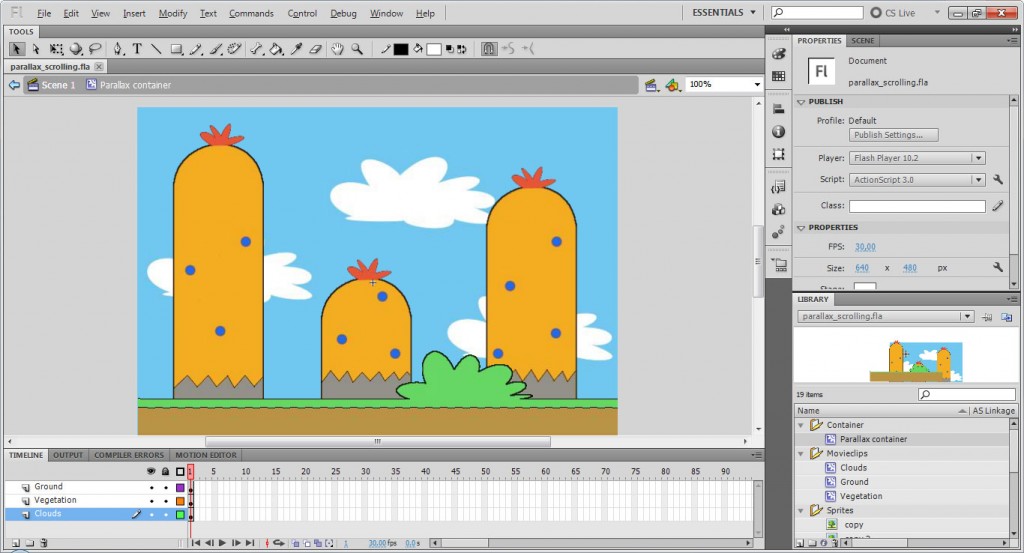
- Start Flash Professional and create a new project. Then add a movieclip to the stage that will serve as a container. Once that’s done, add a few movieclips to the newly created movieclip (the container).
NOTE: Yes, they have to be movieclips for this to work. It works with Graphics as well, but only trough actionscript. - Arrange the movieclips to your liking; once the scene looks good, we can begin working our magic.
TIP: To make it somewhat easier for you, you should arrange all layers neatly.
-
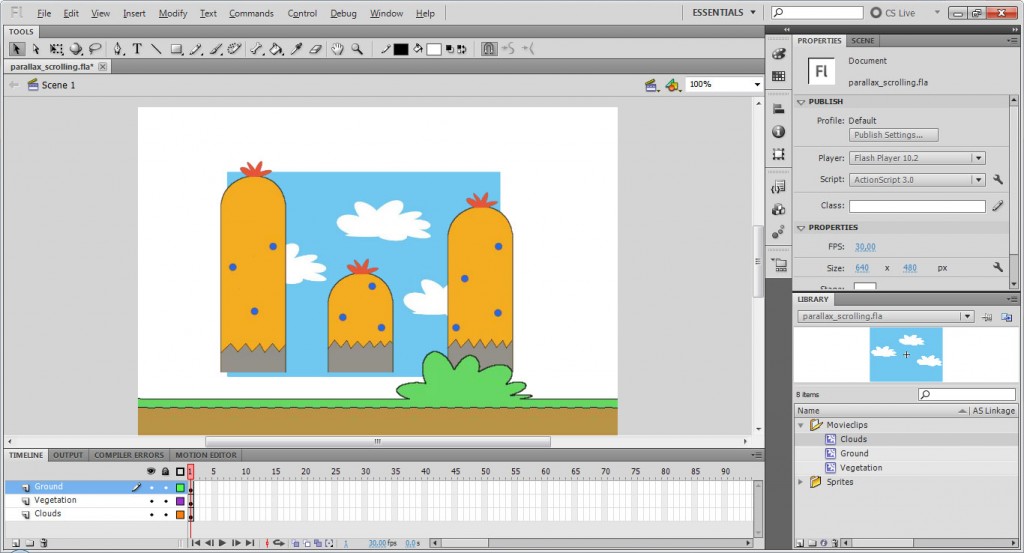
Now you need the set the “Z” position of the objects you wish to move to the background. The higher the Z position, the further away the object will be seen.
In this example, I’m setting the ground to a z-position of 0, the Vegetation to 200 and the clouds to 400. You now notice that the movieclips will shrink in size. This is not true, they still have the same size.
It only looks as if they are smaller.
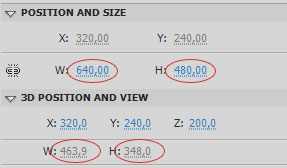
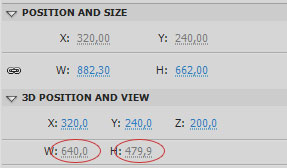
 The only thing we have to to is make sure that the 3D size matches the original image’s size.

This is no exact science, so you probably have to puzzle a bit.
Adding the code (optional)
So now that we’ve designed the scene, we are ready to do something with it.
I’ve added a small script that makes the container go left and right so that you can see the result.
import flash.ui.Keyboard;

stage.addEventListener(KeyboardEvent.KEY_DOWN, fl_KeyboardDownHandler_3);

function fl_KeyboardDownHandler_3(event:KeyboardEvent):void
{
  if(event.keyCode == Keyboard.LEFT)
  {
    container.x -= 2;
  }
  else if(event.keyCode == Keyboard.RIGHT)
  {
    container.x += 2;
  }
}
Just name your container “container” on the scene and add the actionscript code to the first frame of the stage.
When you run the movie, you should be able to see the parallax effect when you press the left or right arrow key.
Outro
Well, that’s pretty much it. All you have to do is add a few movieclips, adjust the Z-depth and then move your container in any direction you want.
Oh, and before I forget, you can download the source files here:
Parallax Scrolling Source Files
~Michiel De Mey