Network discovery using UDP Broadcast (Java)
The Problem
I have a Java server and a Java client running on the same network and the applications are not to be used outside a private network (not over internet).
So I used a static IP for the server, but what if I deploy my application? What if the network changes? That means I’ll lose my connection to the server and I’ll have to change the IP on the client side again.
Now that would be stupid. I want the client to “discover” the server on the network and connect with it.
The Solution
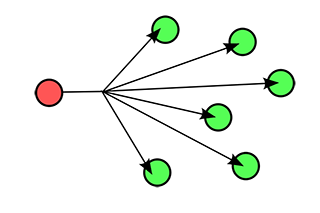
Using UDP packets and broadcasting them! This technique however is not optimal, but as long as we stay in one network this shouldn’t be a problem.
UDP packets however are fairly easy to work with. So let’s get started.
Still here? Let’s do this!
Server implementation
First, Let’s create the Java Singleton class that will execute the code on the server-side. This will be multi-threaded of course, so we’ll also implement “Runnable”.
When we implement Runnable, we also have to override the Run method.
public class DiscoveryThread implements Runnable {

  @Override
  public void run() {
  }

  public static DiscoveryThread getInstance() {
    return DiscoveryThreadHolder.INSTANCE;
  }

  private static class DiscoveryThreadHolder {

    private static final DiscoveryThread INSTANCE = new DiscoveryThread();
  }

}
Ok, let’s think about this. What do we have to do?
- Open a socket on the server that listens to the UDP requests. (I’ve chosen 8888)
- Make a loop that handles the UDP requests and responses
- Inside the loop, check the received UPD packet to see if it’s valid
- Still inside the loop, send a response to the IP and Port of the received packet
That’s it on the server side.
Now, we’ll translate this into code.
DatagramSocket socket;

  @Override
  public void run() {
    try {
      //Keep a socket open to listen to all the UDP trafic that is destined for this port
      socket = new DatagramSocket(8888, InetAddress.getByName("0.0.0.0"));
      socket.setBroadcast(true);

      while (true) {
        System.out.println(getClass().getName() + ">>>Ready to receive broadcast packets!");

        //Receive a packet
        byte[] recvBuf = new byte[15000];
        DatagramPacket packet = new DatagramPacket(recvBuf, recvBuf.length);
        socket.receive(packet);

        //Packet received
        System.out.println(getClass().getName() + ">>>Discovery packet received from: " + packet.getAddress().getHostAddress());
        System.out.println(getClass().getName() + ">>>Packet received; data: " + new String(packet.getData()));

        //See if the packet holds the right command (message)
        String message = new String(packet.getData()).trim();
        if (message.equals("DISCOVER_FUIFSERVER_REQUEST")) {
          byte[] sendData = "DISCOVER_FUIFSERVER_RESPONSE".getBytes();

          //Send a response
          DatagramPacket sendPacket = new DatagramPacket(sendData, sendData.length, packet.getAddress(), packet.getPort());
          socket.send(sendPacket);

          System.out.println(getClass().getName() + ">>>Sent packet to: " + sendPacket.getAddress().getHostAddress());
        }
      }
    } catch (IOException ex) {
      Logger.getLogger(DiscoveryThread.class.getName()).log(Level.SEVERE, null, ex);
    }
  }
A few notes; If you want to use strings as commands (like I do in this example), you have to trim the string before comparing it.
There, that’s it for the server.
Client implementation
Now we have to write the code for the client. Again, let me sketch how we are going to work.
- Open a socket on a random port.
- Try to broadcast to the default broadcast address (255.255.255.255)
- Loop over all the computer’s network interfaces and get their broadcast addresses
- Send the UDP packet inside the loop to the interface’s broadcast address
- Wait for a reply
- When we have a reply, check to see if the package is valid
- When it’s valid, get the package’s sender IP address; this is the server’s IP address
- CLOSE the socket! We don’t want to leave open random ports on someone else’s computer
On a side note, we don’t close the socket on the server because the server will receive and send UPD packets until the server is closed. Closing the socket on the server means that we won’t be able to discover it any more.
Wow, that was quite a lot. Now let’s put this into code!
        // Find the server using UDP broadcast
        try {
          //Open a random port to send the package
          c = new DatagramSocket();
          c.setBroadcast(true);

          byte[] sendData = "DISCOVER_FUIFSERVER_REQUEST".getBytes();

          //Try the 255.255.255.255 first
          try {
            DatagramPacket sendPacket = new DatagramPacket(sendData, sendData.length, InetAddress.getByName("255.255.255.255"), 8888);
            c.send(sendPacket);
            System.out.println(getClass().getName() + ">>> Request packet sent to: 255.255.255.255 (DEFAULT)");
          } catch (Exception e) {
          }

          // Broadcast the message over all the network interfaces
          Enumeration interfaces = NetworkInterface.getNetworkInterfaces();
          while (interfaces.hasMoreElements()) {
            NetworkInterface networkInterface = interfaces.nextElement();

            if (networkInterface.isLoopback() || !networkInterface.isUp()) {
              continue; // Don't want to broadcast to the loopback interface
            }

            for (InterfaceAddress interfaceAddress : networkInterface.getInterfaceAddresses()) {
              InetAddress broadcast = interfaceAddress.getBroadcast();
              if (broadcast == null) {
                continue;
              }

              // Send the broadcast package!
              try {
                DatagramPacket sendPacket = new DatagramPacket(sendData, sendData.length, broadcast, 8888);
                c.send(sendPacket);
              } catch (Exception e) {
              }

              System.out.println(getClass().getName() + ">>> Request packet sent to: " + broadcast.getHostAddress() + "; Interface: " + networkInterface.getDisplayName());
            }
          }

          System.out.println(getClass().getName() + ">>> Done looping over all network interfaces. Now waiting for a reply!");

          //Wait for a response
          byte[] recvBuf = new byte[15000];
          DatagramPacket receivePacket = new DatagramPacket(recvBuf, recvBuf.length);
          c.receive(receivePacket);

          //We have a response
          System.out.println(getClass().getName() + ">>> Broadcast response from server: " + receivePacket.getAddress().getHostAddress());

          //Check if the message is correct
          String message = new String(receivePacket.getData()).trim();
          if (message.equals("DISCOVER_FUIFSERVER_RESPONSE")) {
            //DO SOMETHING WITH THE SERVER'S IP (for example, store it in your controller)
            Controller_Base.setServerIp(receivePacket.getAddress());
          }

          //Close the port!
          c.close();
        } catch (IOException ex) {
          Logger.getLogger(LoginWindow.class.getName()).log(Level.SEVERE, null, ex);
        }
There, that’s it!
I’ve given you pretty much all of the code, so it shouldn’t be easy to implement.
Don’t forget to run your DiscoveryThread!
Thread discoveryThread = new Thread(DiscoveryThread.getInstance());
    discoveryThread.start();
~Michiel De Mey

How to use the ExpandableListView in Android
Definition:
A view that shows items in a vertically scrolling two-level list. This differs from the ListView by allowing two levels: groups which can individually be expanded to show its children. The items come from the ExpandableListAdapter associated with this view.
– http://developer.android.com/reference/android/widget/ExpandableListView.html
Intro
Ok, I’m going to try and explain to you the easiest way to implement a ExpandedListView in your android project. It took me nearly 4 hours to do all the research and get it fully working on an android device.
Let’s begin
Ok, let’s begin by creating a new Activity. I named my activity ProductsActivity. And your activity should extend ExpandableListActivity.
public class ProductsActivity extends ExpandableListActivity {

}
And before we start we have to create an ExpandableListAdapter.
private ExpandableListAdapter mAdapter;
Create your groups and children
Now, because my application has Categories and Products, I will also declare my categories and products.
private List<String> cats = new ArrayList<String>();
Then fill them with some content and flatten the ArrayList to a simple array. I simply prefer to use ArrayLists because they allow me to dynamically add data unlike a traditional Array. And I need to flatten them to a basic Array because you will see that my Adapter only accepts basic Arrays.
cats.add("Alcoholisch");
cats.add("Non-Alcoholisch");
cats.add("Eten");
String[] categories = cats.toArray(new String[cats.size()]);
Now comes the tricky part. I’m going to create a List inside a List. (nested lists)
I’s basically just 2d array, but dynamic because Lists can add items without the need to resize them.
List<List<Product>> list = new ArrayList<List<Product>>();
Now that’s done, I can start filling the List with Lists of Product.
List<Product> alcohol = new ArrayList<Product>();
 alcohol.add(new Product("Jupiler", 1));
 alcohol.add(new Product("Palm", 1));
 alcohol.add(new Product("Duvel", 2));
 list.add(alcohol);

List<Product> frisdrank = new ArrayList<Product>();
 frisdrank.add(new Product("Cola", 1));
 frisdrank.add(new Product("Fruitsap", 1));
 frisdrank.add(new Product("Water", 1));
 list.add(frisdrank);

List<Product> eten = new ArrayList<Product>();
 eten.add(new Product("Hamburger", 2));
 eten.add(new Product("Hotdog", 2));
 list.add(eten);
Again, we will have to flatten these nested Lists to a standard 2d Array. (Because my custom Adapter uses 2d arrays and not nested Lists) Luckily there are multiple libraries that can do this.
I’m using Transmorph to do this. Using this Library it’s extremely easy to convert the nested Lists to the required 2d Array.
Transmorph transmorph = new Transmorph(new DefaultConverters());
Product[][] products = transmorph.convert(list, Product[][].class);
Create your own ExpandableListAdapter
Now, I will create my own ExpandableListAdapter. I will not explain how to do this, simply copy/paste the following code. (If you wish to learn more about creating your own ExpandableListAdapter, I suggest you read the Android documentation)
  public class ProductExpandableListAdapter extends BaseExpandableListAdapter {
    // Sample data set.  children[i] contains the children (String[]) for groups[i].

    private String[] groups;
    private Product[][] children;

    public ProductExpandableListAdapter(String[] groups, Product[][] children) {
      this.groups = groups;
      this.children = children;
    }

    public Object getChild(int groupPosition, int childPosition) {
      return children[groupPosition][childPosition];
    }

    public long getChildId(int groupPosition, int childPosition) {
      return childPosition;
    }

    public int getChildrenCount(int groupPosition) {
      return children[groupPosition].length;
    }

    public TextView getGenericView() {
      // Layout parameters for the ExpandableListView
      AbsListView.LayoutParams lp = new AbsListView.LayoutParams(ViewGroup.LayoutParams.MATCH_PARENT, 64);

      TextView textView = new TextView(ProductsActivity.this);
      textView.setLayoutParams(lp);
      // Center the text vertically
      textView.setGravity(Gravity.CENTER_VERTICAL | Gravity.LEFT);
      // Set the text starting position
      textView.setPadding(36, 0, 0, 0);
      return textView;
    }

    public View getChildView(int groupPosition, int childPosition, boolean isLastChild, View convertView, ViewGroup parent) {
      TextView textView = getGenericView();
      textView.setText(getChild(groupPosition, childPosition).toString());
      return textView;
    }

    public Object getGroup(int groupPosition) {
      return groups[groupPosition];
    }

    public int getGroupCount() {
      return groups.length;
    }

    public long getGroupId(int groupPosition) {
      return groupPosition;
    }

    public View getGroupView(int groupPosition, boolean isExpanded, View convertView, ViewGroup parent) {
      TextView textView = getGenericView();
      textView.setText(getGroup(groupPosition).toString());
      return textView;
    }

    public boolean isChildSelectable(int groupPosition, int childPosition) {
      return true;
    }

    public boolean hasStableIds() {
      return true;
    }
  }
Set the adapter
We’re almost done, all we have to do now is set the list adapter.
mAdapter = new ProductExpandableListAdapter(categories, products);
setListAdapter(mAdapter);
And we’re done. We can now see our list with our categories and it’s products.
~Michiel De Mey
Categories
- Android (1)
- Flash (1)
- HTML5 (9)
- Programming (15)
- .Net Programming (3)
- Java (2)
- PHP (1)
- Web (11)