Proxying WebSockets with Nginx and Socket.IO
Why would you want to proxy WebSockets through Nginx?
That’s probably the first question that comes to mind. Why would you want to proxy your websockets?
The answer is pretty simple. You want your Nginx to run on port 80 (duh) but you also want your WebSockets to go through port 80, right?
That way, you shouldn’t have any trouble connecting to a WebSocket server when you are behind a firewall.
The Problem
My problem was that my WebSocket server was running on port 5000. It would work when connecting to it from my localhost.
ws://localhost:5000
But when I wanted to push it to production and try it on my university’s network it wouldn’t work!
Obviously that was to be expected.
Our university’s network only allows a couple of ports through their firewall. Obviously port 80 was one of them and port 5000 was not.
Now the problem is that my server was already running Nginx on port 80. So obviously my WebSocket server couldn’t run on port 80.
And this is where proxying comes in play.
Using WebSocket proxying in Nginx I can keep my WebSocket server running on port 5000 and my Nginx on port 80.
All I had to do was configure my Nginx to start proxying WebSockets from port 80 (external) to port 5000 (internal).
After that, you can simply connect to
ws://yourhost.com:80 (You don’t have to specify the port if you’re using port 80, but I’m doing this anyway just to make it clear)
Let’s start doing stuff already!
Ok, so the first thing you need to know is that WebSocket proying is supported in Nginx since version 1.3.13 which is (as of this date) a development version.
So if you’re running Nginx in production, you might not want to upgrade just yet.
The first thing you want to do is open up the Nginx configuration file. I’m using nano (no VIM, sorry) for this.
Then find where you defined your virtual server and add the configuration needed to proxy websockets:
location /socket.io/ {
proxy_pass http://localhost:8080;
proxy_http_version 1.1;
proxy_set_header Upgrade $http_upgrade;
proxy_set_header Connection $connection_upgrade;
}
So, what exactly is happening here?
First, we define the route in which we want to work. When using Socket.io as the WebSocket server, all WebSocket traffic will normally go through the /socket.io/ route. e.g. http://michieldemey.be/socket.io/
(You can change this default route in socket.io’s configuration: https://github.com/LearnBoost/Socket.IO/wiki/Configuring-Socket.IO)
Anyway, my Nginx is running on port 80 (external) and I need to proxy all WebSocket traffic to port 8080 (internal).
We can specify this using “proxy_pass” setting.
As you can see in my configuration above, I’m proxying everything to http://localhost:8080. So now I’m proxying all WebSockets to my SebSocket server running on port 8080.
But that’s not all. You need to specify that you want to use HTTP 1.1, because WebSockets use the “Upgrade” header that’s only available in HTTP 1.1 and not HTTP 1.0.
The other two settings are basically just to fill in the Upgrade and Connection header. Leave it as is and it should work.
And that’s pretty much it!
So now I’m proxying WebSockets through port 80 to port 8080. And that without too much configuration.
For more information, check out Nginx’s official page on this topic: http://nginx.org/en/docs/http/websocket.html
Create a basic HTML5 platformer with Crafty and Box2D – Part 3

Halt, brave adventurer!
This article requires some knowledge of JavaScript.
Documentation: JavaScript, Crafty, Box2DWeb (Basic Usage).
Github repo: Crafty Platformer Tutorial
Every game needs a hero.
A game wouldn’t be complete without a protagonist, right? So let us create one.
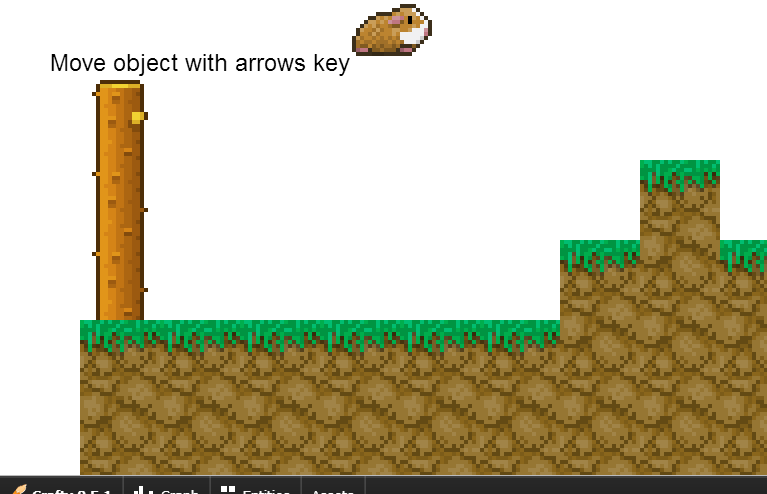
Though he’s not much of a hero, I’ll be using this Guinea pig.

And here’s an animated version. We won’t be using this gif though.

It will have to do for now. Feel free to create your own hero though. Just make sure you create a spritesheet of your hero.
The implementation.
The sprite
Save your spritesheet (or use mine) to your web/images/ folder and give it an appropriate name.
First, we will have to define the sprite in the sprites.js file. Following the example, you should have something like this:
        images:{
            'ufo' : {
                 'file' : 'web/images/ufo.png',
                 'tile' : 211,
                 'tileh' : 117,
                 'elements': {
                     'ufo' : [0, 0]
                 }
            },
            'guinea' : {
                 'file' : 'web/images/guineapig.png',
                 'tile' : 80,
                 'tileh' : 56,
                 'elements': {
                     'guinea' : [0, 0]
                 }
            }
        }
NOTE: The “tile” property should be the width of a single frame of your animation. In my case it’s 80 pixels.
The entity
Now that Crafty knows which sprites to load, we can continue. Now we’ll create the entity.
Obviously we’re going to create it in the entities folder.
Create a new javascript file there. Mine’s called guineapig.js.
Let me first show you what’s in it. I’ll explain later.
GuineaPig = BaseEntity.extend({
    defaults: {
    },
    initialize: function(){
    	var model = this;
    	var entity = Crafty.e("2D, " + gameContainer.conf.get('renderType') + ", guinea, SpriteAnimation");

    	entity
            .attr({x: ((Crafty.viewport.width/2) - (entity.w/2)), y: 0, z: 300})
            .animate("walking", 0, 0, 2)
            .bind('EnterFrame', function(e){
              this.animate("walking", 20);
            })
            .setName('Guinea Pig');

            entity.origin(entity.w/2, entity.h/2);

    	model.set({'entity' : entity });
    }
});
So how does this all work?
First we need to extend the BaseEntity.
GuineaPig = BaseEntity.extend({ ... });
You will always have to do this when using Crafty’s Boilerplate. Don’t forget to name your entity as well. In my case GuineaPig.
Next up is the defaults. Here you can set properties of an entity. These will be Backbone properties from Backbone.js! Not Crafty properties.
defaults: { },
    initialize: function(){
    	...
    }
Everything in this function will be executed when the entity is first created. This will happen only once.
var model = this;
This is the variable that actually holds the Backbone object. You can use this variable to change the properties that you’ve defined in the defaults.
var entity = Crafty.e("2D, " + gameContainer.conf.get('renderType') + ", guinea, SpriteAnimation");
This is the actual entity itself. Note the “guinea” component, it has to be the same name as the sprite you defined in sprites.js.
Also the “SpriteAnimation” component is mandatory.
Next we set a few properties of our hero. I won’t go over all of them, just the special ones.
.animate("walking", 0, 0, 2)
With this one, we define the animation. Or in crafty terms: a “reel”.
The first parameter is the id of the reel.
The second one defines the x-value of the starting of the reel, unit is the width of our frame width. (It was 80 pixels, remember?)
The third parameter is the y-value. Unit is the height of our spritesheet.
And the fourth parameter is the end x position on the sprite map. In our case 2. (3 frames, but the index starts at 0 so it’s 2.)
Read more about it in their documentation: http://craftyjs.com/api/SpriteAnimation.html
            .bind('EnterFrame', function(e){
              this.animate("walking", 20);
            })
Now that we have defined the animation, we can use it. Just bind the animation to the EnterFrame event for now.
The first parameter is the reel id. As we have defined above.
The second parameter is actually the delay in-between frames. The unit is in milliseconds.
There, that’s it for our guinea pig. Now we just have to wrap it up.
Wrapping it up
Now that we have defined our hero, we still have to load it. This is done in our main scene.
        var elements = [
        "src/entities/ufo.js",
        "src/entities/guineapig.js",
        "src/interfaces/info.js"
	];
Simply adding our script will load it.
But that’s not enough. One more thing to do.
We still have to initialize it.
        //when everything is loaded, run the main scene
	require(elements, function() {
		//sc['ufo'] = new Ufo();
                sc['guineapig'] = new GuineaPig();
		infc['info'] = new Info();
	});
Easy, no? All we had to do was create a new instance of our hero.
I’ve also commented out the UFO object since we won’t be needing it. That means it won’t be initialized.
This should be the end result.

That’s it for now. I will discuss how to add physics and move your hero later.
Create a basic HTML5 platformer with Crafty and Box2D – Part 2.5

Halt, brave adventurer!
This article requires some knowledge of JavaScript.
Documentation: JavaScript, Crafty, Box2DWeb (Basic Usage).
Github repo: Crafty Platformer Tutorial
A continuation of our previous quest.
Previously we created a simple level using Tiled and in this quest we will take it a bit further.
We are going to add physics to the game. This isn’t 1997, we have modern technologies nowadays so we’d better use them.
On the downside, it can be quite difficult to learn Box2D at first but it’s really fun once you get into it.
Let’s get magical!
While physics are nothing magical, they are rather fascinating. More then that, they give your game a more dynamic and realistic feeling.
Just don’t overdo it. Though physics being awesome, they do have a big impact on performance.
Enough loitering
For this tutorial we’ll need Box2dWeb and the CraftyBox2d component. Demos for Crafty’s CraftyBox2d component can be found on their GitHub page.
NOTE: If you’re interested in Box2d, I strongly recommend that you check out the demos. There is some interesting stuff in there.
Anyway, download Box2dWeb and the CraftyBox2d component.
I’m going to add the Box2dWeb library in the libs folder and the CraftyBox2d component in the components folder.
Now we just have to load both the library and the component in our JavaScript.
To load our library, we’ll have to add it to our index.html page. Very simple stuff.
<script src="src/libs/Box2dWeb-2.1.a.3.min.js"></script>
And our component, just like we did in part 2.
                // array with local components
                var elements = [
                    "src/components/MouseHover.js?v="+version+"",
                    "src/components/craftybox2d-release-uncompressed.js?v="+version+"",
                    "src/components/tiledlevel-release-uncompressed.js?v="+version+"",
                    "src/entities/base/BaseEntity.js?v="+version+"",
	    		];
And now we’ve set up our physics world. Now we just have to initialize it and we should be ready to go.
Simply call the init function. This can either be in game.js or scenes/main.js depending on when you want the physics to be enabled.
I’ve initialized it in scenes/main.js.
Crafty.box2D.init(0, 10, 32, true);
USAGE:
The first parameter is the gravity along the x-axis. In this case 0, otherwise we would be pulled to the side.
The second parameter is the gravity along the y-axis. I’ve set it to 10. This will make all physics objects fall down.
The third parameter is the “pixel-to-meter” ratio. I’ve set it to 32. That means that 32 pixels = 1 meter in the game.
The fourth parameter will allow bodies to “sleep” when they are inactive. It’s best to leave this to true for performance.
Now we should be able to work with physics!
Applying the magic.
Now let’s go and add the physics to our level.
To do this, we’ll have to edit the TiledLevel component we used in part 2. Don’t worry, it’s nothing major.
Somewhere around line 18 you should see all the components of each of our tiles.
components = "2D, " + drawType + ", " + sName + ", MapTile";
Simply add the Box2D component.
components = "2D, " + drawType + ", " + sName + ", MapTile, Box2D";
One more thing and we’re done editing.
Simply define the Box2D properties of the entity. Around line 46 you’ll see that you can set properties of the tile entity.
Just add the folowing Box2d property and we should be good.
tile.box2d({ bodyType: 'static' }); //Add the physics!
Change ‘static’ to ‘dynamic’ to see the level collapse. Really fun!
(We won’t be using that though. Just set it back to static after you’ve done playing ;))

Though before you do that, you might want to create a floor in scenes/main.js that prevents anything from falling through.
        // Create the floor
        var floor = Crafty.e("2D, Canvas, Box2D, death")
          .attr({
              isFloor: true
          })
          .setName("Box2D Floor")
          .box2d({
              bodyType: 'static',
              shape: [[0, Crafty.viewport.height], [Crafty.viewport.width, Crafty.viewport.height]]
          });
That’s the end of todays quest.
Though before you go, I’d like to give you another tip.
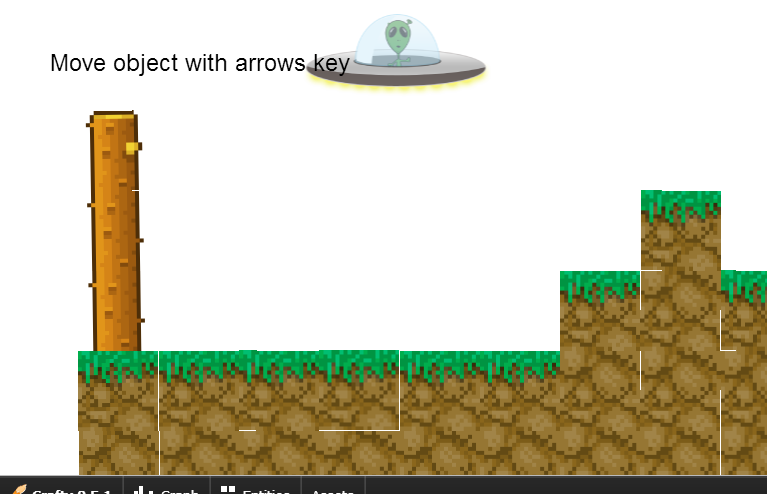
TIP: Use Box2D’s debug view to see which objects have physics applied to them and other useful information.
//Start the Box2D debugger
Crafty.box2D.showDebugInfo();
Create a basic HTML5 platformer with Crafty and Box2D – Part 2

Halt, brave adventurer!
This article requires some knowledge of JavaScript.
Documentation: JavaScript, Crafty, Box2DWeb (Basic Usage).
Github repo: Crafty Platformer Tutorial
Welcome back brave adventurer!
Ok, I’m going to try to explain as much as possible. Though I won’t go over the obvious stuff for obvious reasons.
First, let’s install the Crafty Boilerplate. Simple download it and extract it to your webserver’s public folder.
This should be the directory structure: (Taken from the boilerplate’s documentation)
-- src
---- components -> Crafty components files
---- entities -> Files with entities
-------- base
------------ baseEntity.js -> Base entity
---- interfaces -> We keep here files with interface entities
---- levels -> Configuration files for levels
---- scenes -> Files with scenes declarations
---- windows -> Files with logic for interface windows
---- libs -> Other libraries files
-------- backbone
-------- jquery
-------- modernizr
-------- require-jquery
-------- underscore
---- config.js -> Game configuration
---- game.js -> Main file of the game
---- sprites.js -> Sprites definitions
-- web
---- images
-- index.html -> Game wrapper
When you browse to the correct URL (using your preferred web browser), you should see the Boilerplate working.

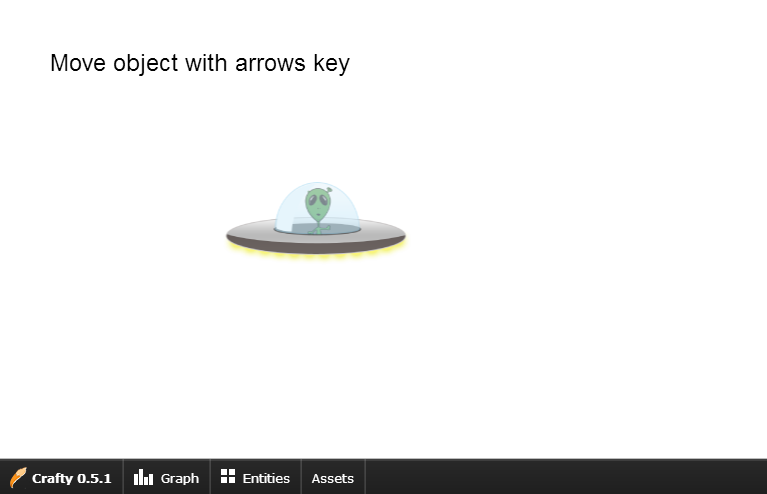
Quite simple, no? Anyway, feel free to have a look around the Boilerplate. But for now, all you can do is move an (ugly) UFO over the screen. Hardly exciting.
So we’ll do better!
And so it begins.
The first thing we want to do is create a level. I’ll be showing you how to create tiled levels using Crafty’s TiledLevel component.
Download the component and add the JavaScript file to the Components folder.
NOTE: I prefer to download the non-minified versions of scripts so that I can modify the scripts if need be. You can always minify them later.
Now that we’ve downloaded and installed the component, we’re ready to load it.
Components are loaded in game.js. Somewhere around line 41 we can see exactly how to do that.
                // array with local components
                var elements = [
                    "src/components/MouseHover.js?v="+version+"",
                    "src/entities/base/BaseEntity.js?v="+version+"",
	    		];
So we’ll just add our new component after the one that’s already added. We should now have something like this.
                // array with local components
                var elements = [
                    "src/components/MouseHover.js?v="+version+"",
                    "src/components/tiledlevel-release-uncompressed.js?v="+version+"",
                    "src/entities/base/BaseEntity.js?v="+version+"",
	    		];
NOTE: Crafty has a built-in way to remotely load components. http://craftyjs.com/api/Crafty-modules.html
Though to be honest, I prefer to have my components on my own web server. When you have modified a component or wrote your own you will have to use the method above.
Let’s have some fun now.
The component we’re using can load maps created with Tiled. Download it and create a simple level. I’m not going to explain how to used Tiled here. You’ll have to learn that yourself. It’s not that difficult really.
Or you can be cheap and use my map and tileset.
NOTE: You have to export your level to .json.
Here’s my map. Nothing special.
{ "height":6,
 "layers":[
        {
         "data":[0, 0, 0, 0, 0, 0, 0, 0, 0, 0, 0, 0, 0, 0, 0, 0, 36, 0, 0, 0, 0, 0, 0, 0, 0, 0, 0, 0, 36, 0, 0, 43, 0, 0, 0, 0, 0, 0, 15, 0, 0, 0, 0, 43, 0, 0, 43, 0, 0, 0, 0, 0, 15, 22, 15, 0, 0, 0, 43, 0, 0, 15, 15, 15, 15, 15, 15, 22, 22, 22, 15, 15, 15, 15, 0, 0, 22, 22, 22, 22, 22, 22, 22, 22, 22, 22, 22, 22, 22, 0],
         "height":6,
         "name":"Tilelayer 1",
         "opacity":1,
         "type":"tilelayer",
         "visible":true,
         "width":15,
         "x":0,
         "y":0
        }],
 "orientation":"orthogonal",
 "properties":
    {

    },
 "tileheight":80,
 "tilesets":[
        {
         "firstgid":1,
         "image":"./web/levels/tiles.png",
         "imageheight":640,
         "imagewidth":560,
         "margin":0,
         "name":"Lemcraft",
         "properties":
            {

            },
         "spacing":0,
         "tileheight":80,
         "tilewidth":80
        }],
 "tilewidth":80,
 "version":1,
 "width":15
}
You have to change the “image” property to the folder where your level’s tileset is stored.
Back on track.
Now that we’ve created our level, let’s go and display it on our stage.
The current documentation on how to use TiledLevel is outdated.
Let me fill you in. To render your level, simply use the following code.
Best you place this in scenes/main.js at the bottom.
var map = Crafty.e("TiledLevel"); //Creates an entity with the "TiledLevel" component.
map.tiledLevel("./web/levels/level.json", "Canvas"); //Draw the level (explained below).
Usage:
The first parameter we’ll be filling in is the URL to the map. (in JSON format)
The second parameter is the render type. You can choose either Canvas or DOM. I mostly use Canvas unless I want to render text.
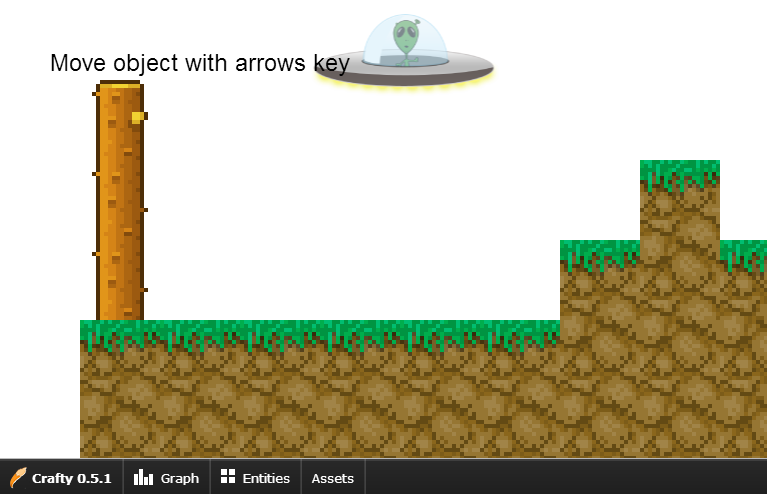
When all is well you should see your level appear!

And that concludes this part of our adventure.
I just would like to give you this small tip.
In game.js somewhere at line 14, you should see Crafty.init. Here you can set the size of the stage. By default it’s set to 800×600.
Remove both parameters and leave the function empty to stretch your game to the size of your browser window.
Crafty.init();
Hopefully I’ll see you in our next adventure!
Next chapter.
Part 2.5 is ready. Read the next chapter: https://michieldemey.be/blog/create-a-basic-html5-platformer-with-crafty-and-box2d-part-2-5/.
Create a basic HTML5 platformer with Crafty and Box2D – Part 1

Halt, brave adventurer!
This article requires some knowledge of JavaScript.
Documentation: JavaScript, Crafty, Box2DWeb (Basic Usage).
Github repo: Crafty Platformer Tutorial
If you are reading this..
Well, if you’re reading this that means you are interested in creating a simple, solid physics platformer. And that’s exactly what I’m going to try to teach you.
I’ll be using a rather simple framework called Crafty. It has an Entity Component System.
You might want to read a bit about that here: http://cowboyprogramming.com/2007/01/05/evolve-your-heirachy/.
It’s the same framework that I’ve used to create my previous game Jetpack Awesomeness.
What’s in our quest log?
First let me tell you what we’ll be doing. (Subject to change)
- Setting up your environment.
- Create a level using Crafty’s TiledLevel Component.
- Create a character
- Move the character
- Polish the character’s jumping.
Setting up your environment.
First and most importantly, we have to set up our environment.
I’m using Netbeans (I’m also a Java programmer), but any IDE that supports JavaScript syntax will do. It doesn’t even have to be an IDE. If you prefer to code in Textmate, Coda, Sublime Text or Wordpad, go ahead!
NOTE: I would suggest setting up a web server such as Apache.
Although this is usually not necessary when you’re creating JavaScript games, but if you want to be able to load certain elements using AJAX, you’ll need the web server.
In our case, Crafty’s TiledLevel component will load the maps trough AJAX and it will not work without a web server.
One last thing. I’ll be using the Crafty Boilerplate so we can get started quite easily.
Download the Boilerplate from their GitHub repository and extract/copy it to your web server’s public folder. (Usually the htdocs or www folder)
That’s it for part 1!
Have a look around in the Boilerplate and read up on some of the documentation about Crafty and some of it’s components.
We’ll be using the following (Third-Party) components: TiledLevel, CraftyBox2d
Eager to continue this adventure? Go to part 2!
Categories
- Android (1)
- Flash (1)
- HTML5 (9)
- Programming (15)
- .Net Programming (3)
- Java (2)
- PHP (1)
- Web (11)