
How to set up Log4Net
Log4Net is a logging framework written by our good friends at Apache. It’s a .Net port from their Java logging framework Log4J.
Check out their other amazing logging frameworks! http://logging.apache.org/
Why?
Why did I choose Log4Net above all other logging frameworks for .Net?
A couple of reasons:
- It’s free (hooray!)
- It’s easy to use. It’s as simple as
App.Log.Info("This is some information");App.Log.Debug("This is some debug message");catch (Exception ex) { App.Log.Error(ex); }and so on..
- It’s practically the same syntax for all their logging frameworks. Whether you use PHP, Java or .Net.
Why would I want to write about Log4Net? Well, simply because I believe that young developers such as myself lack the ability to debug properly.
Usually you write a small program, you think it’s ready to be deployed and you tell all your friends about it.
Of course, the program hasn’t been tested properly and it’s most likely still full of bugs. Now, as a good developer you should be able to fix those nasty bugs.
Usually that’s where it fails. They don’t know what the problem is. The user is mostly simply presented with a general exception.
And that’s where Log4Net comes in. It’s an easy to use framework to log your exceptions.
NOTE: It’s not some kind of magical framework that does everything for you. It simply logs the exceptions/messages that you want to be logged.
In other words, YOU as a developer still have to tell the program when to log an exception.
Enough intro, let’s get on with it!
Installation
When you download the binaries from their website, you’ll notice in the bin folder that there are a few folders. If you are using Mono.Net, you can get the libraries from the “mono” folder.
I’m only interested in the default “net” folder. Then choose your .Net framework version. (I’m currently coding using .Net 4)
Anyway, you’ll find a .dll file in there. Just include that file in your project and you’ve installed Log4Net. Simple eh?
Configuration
Configuration can be somewhat more confusing. I’d advise you to check their documentation first.
http://logging.apache.org/log4net/release/config-examples.html
As you can see, Log4Net has a lot of Logging appenders.
Logging appenders are methods of logging something. For example, Log4Net can log to a MS SQL Server, SQLite database, the console, a simple .log file and much more!
Let’s get practical
The configuration goes into your app.config file.
First, you’ll have to add a config section for Log4Net.
<configSections> <section name="log4net" type="log4net.Config.Log4NetConfigurationSectionHandler,Log4net"/> </configSections>
Once that is done, we can add a new configuration section.
<log4net> </log4net>
Now, inside this configuration section, we will add our appenders and our root logger.
I always start with defining the root logger.
<root> <level value="DEBUG"/> <appender-ref ref="RollingLogFileAppender"/> </root>
Inside the root element, you can specify the minimum logging level. In this case I will log all DEBUG messages and above.
After that, you will have to specify all the appenders that you want to use. (In this case I’m only using the rolling log file appender. You can read more about it in the documentation.
Once that’s done we can start with the configuration of the actual appenders.
<appender name="RollingLogFileAppender" type="log4net.Appender.RollingFileAppender">
<param name="File" value="log.xml"/>
<param name="AppendToFile" value="true"/>
<rollingStyle value="Size"/>
<maxSizeRollBackups value="10"/>
<maximumFileSize value="10MB"/>
<staticLogFileName value="true"/>
<layout type="log4net.Layout.PatternLayout">
<conversionPattern value="%date [%thread] %-5level %logger [%property{NDC}] - %message%newline"/>
</layout>
</appender>
I’m not going to explain all the details of this configuration, if you want to know more, just check out the documentation. (http://logging.apache.org/log4net/release/config-examples.html#rollingfileappender)
What’s next?
Of course we still have to import our namespaces.
// Import log4net classes. using log4net; using log4net.Config;
Once that’s done, open up App.xaml.cs (using XAML) and declare the global “log” variable.
public static readonly ILog Log = LogManager.GetLogger(typeof(App));
One more thing, tell Log4Net to use the configuration.
log4net.Config.XmlConfigurator.Configure();
So, how do I use it?
It’s really simple. I’ve already shown you a few examples in the intro.
App.Log.info("Your info message here");
etc. to log simple strings.
catch (Exception ex)
{
App.Log.Error(ex);
}
etc. to log exceptions thrown by .Net.
You can log the following levels. The following levels are defined in order of increasing priority:
- ALL
- DEBUG
- INFO
- WARN
- ERROR
- FATAL
- OFF
It that it?
Well, that’s it for the basics. There are a lot more things to do with this framework. Such as adding filters and setting up your own debug layout, but I’m going to leave that to you.
Remember, it’s important to read the documentation! (http://logging.apache.org/log4net/)
~Michiel De Mey
Create rich HTML5 and CSS3 interfaces for desktop applications
The problem
First up, I’d like to state that I’m both a programmer and a designer. I have no problem coding an application or designing a website for that matter.
Now, the thing is.. the web technology today makes it possible to create rich and interactive user interfaces using HTML5, CSS3 and Javascript.
Now, I wanted to create rich and interactive user interfaces in desktop application too, and I thought that WPF would be an answer to that.
I guess I was wrong, WPF is needlessly complex and very unintuitive to work with. You actually have to write a dozen lines of code to create a button that doesn’t look too horrible.
Don’t take it the wrong way. WPF is great, but not for designing user interfaces. So I pretty much gave up on creating rich UI’s for desktop applications.
The Solution
I stumbled upon Awesomium, a web-browser framework based on Chromium/WebKit. With it, you can render HTML5 and CSS3 and even use Javascript!
It’s all very simple. All you have to do is create your GUI in HTML/CSS using your favorite tools and then render the GUI on the desktop application.
Let’s start simple
I’m using WPF in all the examples below. Don’t worry, it’s all just basic WPF.
So how does it work?
Let me quickly explain how we’ll work.
- Design your GUI using your favourite tools.
This is what my design looks like.
- Code your design using HTML and CSS (HTML5 and CSS3 supported!)
- Add JavaScript code to interface with your GUI.
Example:function updateUploadProgress(progressInPercent){ ... } function updateTitle(title){ ... } - Make the desktop application listen to a specific JavaScript call.
webcontrol.SetObjectCallback("guiController", "login", onLoginCall); private void onLoginCall(object sender, JSCallbackEventArgs e) { var arg1 = e.Arguments[0].ToString(); var arg2 = e.Arguments[1].ToString(); ... } - Retrieve the parameters of the JavaScript call and do something with them in your application.
- Update the GUI if needed by calling one of the functions (See step 3) that interface with the GUI.
And that’s basically all you have to do to create a working desktop application using Awesomium.
I will probably write a little tutorial later on how to use Awesomium in-depth. Stay tuned for more!
On a side-note: I’ve added the project to my Github.
https://github.com/MichielDeMey/Savezone
BackgroundWorker UserStates
Definition:
The BackgroundWorker class allows you to run an operation on a separate, dedicated thread. Time-consuming operations like downloads and database transactions can cause your user interface (UI) to seem as though it has stopped responding while they are running. When you want a responsive UI and you are faced with long delays associated with such operations, the BackgroundWorker class provides a convenient solution.
– http://msdn.microsoft.com/en-us/library/system.componentmodel.backgroundworker.aspx
Intro
I ran into a problem when I wanted to create an application to sync my savegames to Dropbox and I’ve found a powerful solution.
The problem
I needed to use a Backgroundworker in my application so that I could execute code without my UI freezing. Now the problem was that the Backgroundworker only has 1 ReportUpdate function.
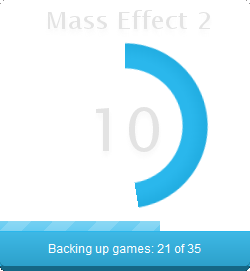
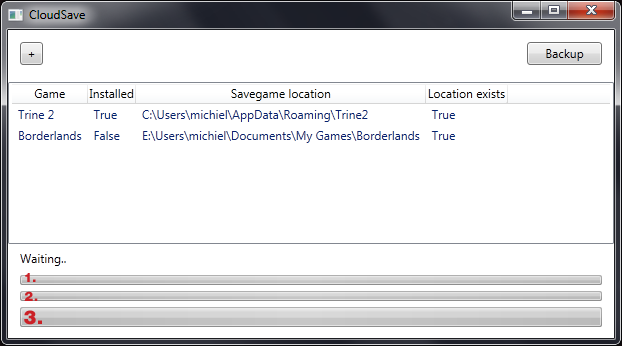
My application has 3 progress bars that show the backup progress.
Note that the application has 3 progress bars.
As you can see on the image, I’m using 3 progress bars to notify the user of the progress.
- Is the games progress. As you can see we currently have 2 games to process.
- Is the files process, this indicates how many files have to be uploaded/have been uploaded.
- Is the upload progress of the current file.
So how do we control these 3 progress bars using 1 BackgroundWorker? Using UserStates!
The solution
We will use UserStates to solve this problem.
As we can see in the documentation, the userState is simply an Object. (ref. http://msdn.microsoft.com/en-us/library/a3zbdb1t.aspx)
So we can pass anything we like from the BackgroundWorker to our GUI.
So, let me show you some code. In my example I’ll simply be passing a String as the userstate. (To keep things simple)
You can also pass an array of data or even a custom object that you’ve made yourself. Just keep in mind not to send too much overhead.
The BackgroundWorker code
When we’ve finished processing a game, I’ll simply call the ReportProgress function and pass the string “games” as the UserState.
worker.ReportProgress(Convert.ToInt32(((double)gamesProcessed / (double)numberOfGames) *100), "games");
I’ll do the same for the files progress and the upload progress.
worker.ReportProgress(Convert.ToInt32((double)currentFileIndex / (double)files.Count * 100), "files");
The upload progress is actually in a different function that recieves the progress as an argument, but that’s not completely relevant.
_worker.ReportProgress(e.PercentageProgress, "upload");
The GUI code
So now that we’ve reported the progress, we have to visualize it on the GUI.
           _worker.ProgressChanged += delegate(object sender1, ProgressChangedEventArgs e1)
           {
                if(Equals(e1.UserState, "games"))
                {
                    pbNumberofGames.Value = e1.ProgressPercentage;
                }
                else if(Equals(e1.UserState,"upload"))
                {
                    pbProgress.Value = e1.ProgressPercentage;
                }
                else if (Equals(e1.UserState,"files"))
                {
                    pbFiles.Value = e1.ProgressPercentage;
                }
            };
All we do here is update the right progress bar associated with the UserState. For example; If the UserState equals “games”, we update the progress bar associated with the games progress. (the first progress bar, I’ve naded it pbNumberofGames)
And that’s it. Now we can report an infinite amount of things from the Backgroundworker!
And you can create rich application when using a custom Object as the UserState.
~Michiel De Mey
Categories
- Android (1)
- Flash (1)
- HTML5 (9)
- Programming (15)
- .Net Programming (3)
- Java (2)
- PHP (1)
- Web (11)